Piece #1: Fine
Jewelry
Create
a piece of wearable fine jewelry. You may use bronze (included in materials
fee) or sterling silver (available for purchase). You may also try
stone-in-place casting, refer to Rio Grande catalog for available gemstones.
Research: refer to jewelry industry
magazines, websites, etc. Be sure to research thoroughly: if you come across a
subject or artist you like, keep researching that subject in-depth. Cite your
sources: publication, page number, artist, title, year, materials.
With this project, we had the opportunity to create any piece of jewellery that we wanted, as long as it included a casted piece. Sebastian Buescher has always inspired me with his figurative work, that's where my work needs to be improved, and so his jewellery never fails to help. I know I want it to be wearable and so I will cast it in silver.
Carving out of wax was sort of easier than I thought it would be, but at the same time harder. It's such a relief to saw wax after sawing metal all the time, but it's difficult in the sense of measurements and sticking to them! Making a ring consists of a lot more thinking and concentrating and following the lines precisely (not saying that this isn't how it should be during metal). But as we will be using the wax to cast, it needs to be perfect, so that there is less work on the metal! I'm enjoying this project so far, lets hope it stays this way! My luck with casting isn't usually all that great!
 |
| Messy!! |
 |
| My two attempts at carving a ring... |
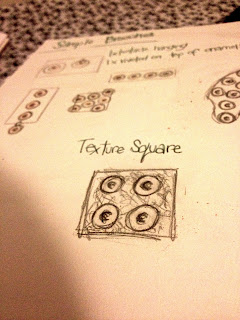
Here are some images of my sketchbook pages, which include sketches, artist research, drawing and sketches, ideas and thoughts, and final images.
Here is my first attempt at making my wax model, I wanted the organic, nature, vessel effect; almost like these could be little flower buds or something. I was not content with this, as I couldn't clean up the wax enough as the one I was using was too soft, but it would have been difficult to use any harder wax. I tried it again, but using a different technique and different wax.
Here it is, my final wax model. So I used the technique of melting tiny, scrap parts of wax, over an alcohol lamp until they ball up, leaving them cool a little and dropping them on to the base of my ring, so that they stay as a ball. If I drop the ball when it is still too hot, it would just completely melt on to the piece. I wanted to do this technique, to get a textured and layered ring. I really enjoyed doing this!
Sebastian Buescher is a jewellery designer I take my inspiration from. I love how figurative his work is, and that's what I don't like about my own work, I am too literal, so I'm always finding myself pulled to Buescher's Jewellery. Here are some of my favourite pieces by him.
Piece #2:
Narrative Jewelry/Object
Create
a piece of narrative jewelry or a small object either exclusively by casting or
that incorporates a cast element.
Research:
Begin
with writing. Find a facet of yourself that you would like to convey in your
work. Try not to be too literal, and find something that is exclusively about
you (your major, faith, favorite animal/food/car,
birthplace/nationality/heritage, etc. are shared by many people and therefore
are not compelling subjects). Think about your personal experiences, memories,
mementos, etc.
From
this writing, explore the subject through drawing and further brainstorming
until you can discover an image that will represent this for you. When you find
this image, design a piece that will incorporate it and also addresses
function. You may also have a particular object you’d like to refer to or
incorporate; include this when you present your research.
This project was to bring something from home to my work. I tried to think of one memory, there was way too many, but all my favourite memories included the beach and the sea, and I remember a poem 'Glas' by Bryan Martin Davies that I studied in school. It's a Welsh poem, that describes where I was born and where my favourite beach is.
This poem is full of imagery, and helped me a lot with this project! Here is the poem, my drawings and ideas and my wax model.
Glas - gan Bryan Martin Davies
Pan oedd Sadyrnau'n las,
a môr yn Abertawe'n rhowlio chwerthin
ar y traeth,
roedd cychod a chestyll a chloc o flodau
yn llanw'r diwrnod;
a gyda lwc, ymdeithiem ar y pensil coch o drên
a farciau hanner cylch ei drac
rown rhimyn glas y bae
i bwynt y Mwmbwls.
Eisteddem ar y tywod twym
yn yfed y glesni,
ein llygaid newynog yn syllu'n awchus
ar fwrdd y môr.
Dilynem ddartiau gwyn y gwylain aflonydd
yn trywanu targed y creigiau,
a sbiem yn syn
ar y llongau banana melyn o'r Gorllewin
a sglefriai'n ara dros y gwydr glas,
a gorffwys dan y craeniau tal
a grafai'r wybren glir
uwchben Glandwr.
'Rhain oedd Sadyrnau'r syndod,
y dyddiau glas,
a ninnau'n ffoaduriaid undydd, brwd,
yn blasu rhyddid byr
o ddyffryn du
totalitariaeth glo.
Here is an image of my final piece in wax, this will soon be casted in to bronze...
Step 1
Creating the wax model
 Step 2
'The Tree' this is when there is more than one object being cast. They are attached by 'runners', which is called 'running it up'. They are connected to the objects, in the are with the less texture, so I will add one of mine to the side of the boat and one to underneath the waves, the reason I am putting two, is because I have a few high points that need to be reached, especially as I have used the ball texture in one area. They must not be at a right angle, as the metal will get trapped, it will not run smoothly, nor will the object get completely filled. It must be attached at a 45 degree angle.
Step 3
It is then attached to a base, which is a domed clay base, so when it is flipped in the vacuum chamber flask, it will have a Cup to pour the metal. A rubber sleeve is added to the flask, not for the plaster to pour out the sides.
Step 4
Plaster is made and very carefully, poured in to the flask at an angle, to ensure the plaster doesn't rapidly hit any of the wax models. It is then put on the vacuum, to get rid of any bubbles for two minutes, then left to set.
 Step 5
Then 'dewaxing'. Which is just a process to melt out the wax, which the class wasn't involved in. It is then ready for pouring.
Step 6
The crucible is heated up with the metal inside, in my case silver and then bronze. The flask sits inside a vacuum chamber, while the metal gets poured quickly but smoothly, and the vacuum is turned on to rid of any bubbles. Especially during the casting silver, as it bubbles whilst heating.
Step 7
It is left to cool a little, then it is quenched and the investment breaks off, which is called the 'knockout'. The tree then needs to be thoroughly cleaned, and the objects can be cut off and ready to be filed and finished.
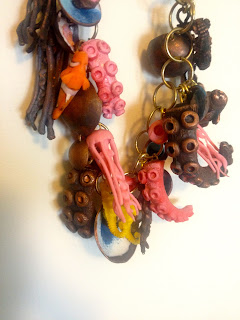
These are my final pieces, they are not entirely finished, as I have had other deadlines to reach sooner, and this project is due in at the of this week (17th May), and so I want it to have my full attention, so that I can really focus on cleaning it up and polishing it as much as I can. Photographs will be uploaded.


