The process of electroforming is in a lot of ways similar to electroplating. It is best described as a process similar to electroplating, but one that is used in manufacturing metallic articles, rather then a means of producing surface coatings. Simply put, the difference in most cases, is that plating is a coating over a metallic item, it is a thin layer and becomes part of the work piece. Electroforming in most cases is metal built-up over a non-metallic surface, it can be quite thick and it can be separated from the mandrel or work piece as a stand alone object. Some of the common uses for electroforming are jewelry, mold making and reproduction of parts.
Felieke Van Der Leest is what influenced me with this piece, I will create a charm necklace or bracelet, using animals, repetition and colour. Just as he does. Here is some examples of his work...
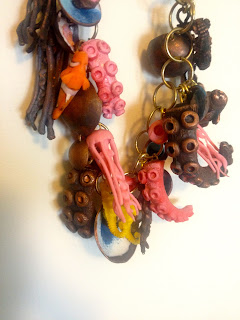
To add my own twist, I will add enamelled domes, because I want the piece to be bold, large scale, full of colour, and have some depth to it. I am thinking of adding different sized domes and enamelling them in blue tones, to represent bubbles, keeping to the 'Under the Sea' theme. I will also be adding the actual rubber figurines/toys, that haven't been electro formed to add colour, texture and a bit of fun!
Felieke Van Der Leest is what influenced me with this piece, I will create a charm necklace or bracelet, using animals, repetition and colour. Just as he does. Here is some examples of his work...
"Unusual attributes like toy animals, crochet work and precious metals are being combined to form humorous and colourful jewellery and objects.
The magic is not just in the unconventional combination of technique and materials but above all in the casual way that she presents this wonderful world ..."
The magic is not just in the unconventional combination of technique and materials but above all in the casual way that she presents this wonderful world ..."
 |
| 2004 Cowboy Lion Cubs Necklace necklace plastic, gold, textile, glass beads 18 x 18 x 4.5 cm |
 |
| 2006 Snail-with-Sprouts Train object with bracelet object 32 x 4.5 x 6 cm |
 |
| 2004 Magician Tiger Cub and his 5½ Little Rabbits necklace silver, textile, plastic tiger cub 7 x 2,5 x 5 cm |
To add my own twist, I will add enamelled domes, because I want the piece to be bold, large scale, full of colour, and have some depth to it. I am thinking of adding different sized domes and enamelling them in blue tones, to represent bubbles, keeping to the 'Under the Sea' theme. I will also be adding the actual rubber figurines/toys, that haven't been electro formed to add colour, texture and a bit of fun!
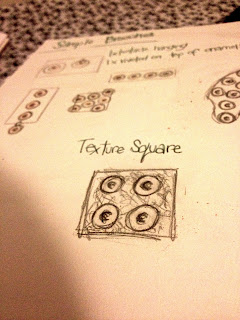
Here are some images of my sketchbook pages, they include photographs, artist research, processes, methods, techniques, designs, inspiration, sketches, ideas and thoughts, and samples.
Step 1
I will glue my objects on to copper wire. When dried, I will paint on an even coat, and when that is completely dried the next step can be made.
Step 2
I will set up the acid solution with the copper sheet inside, then hang my object in to the solution, and clipped to a device. It needs two leads that come out of a digital rectifier, the red lead is connected to the copper sheet, the black one is connected to the copper wire. There also needs to be a magnet tablet at the bottom of the solution, so that it can create a current in the solution for an even cover on the object.
Step 3
The rectifier needs to have a voltage of no higher than 0.12, and left for a few hours but depending on how thick you want the object to be. My objects were quite small, so they only needed to be in the solution for roughly 2/3 hours.
Step 4
It must then be stirred in distilled water after it has been through the acid. It is then ready to be filed and polished.
Here are some images of my final piece...


No comments:
Post a Comment